







All Our Tips
Essential Keyboard Shortcuts for Navigating PowerPoint Like a Pro

You should be very comfortable with the basics of navigating PowerPoint when you are doing a presentation. It looks rather unprofessional when someone gets up in front of an audience and has difficulties in the middle of their presentation. Here are some helpful PowerPoint keyboard shortcuts that will help you navigate through your presentation.
One of the most helpful keyboard shortcuts is using the Space Bar to advance to the next slide. Of course, you can use Page Down, however the Space Bar is a much larger target and it’s easier to hit that if you are nervous or your hands are shaking, and that will help you get through the slides without hitting the wrong key.
Another helpful keyboard shortcut is hitting the Alt key plus the one or two or three digits that represent a slide number and then hit Enter to jump to a specific slide. You should know the numbers of the key slides in your presentation, whether that means memorizing them or having an outline or a list in front of you. That way, if you get to a point in your presentation where there are questions, and you need to jump back to a key slide, you are able to go jump directly to that slide rather than Page Up or Page Down through multiple slides.
Remember to “right click” to access a number of features on the context menu. There are a number of interesting features there that you can access that may help you in doing your presentation and just to show a few of those to you now…if you right click, it pops up a menu that looks something like this. There are a number of options presented to you. If you select “Go” and then by title, there is listing of both slide numbers and titles for your presentation. You can then click on a particular slide and you will jump directly to it.
There are a number of settings for changing your pointer options. You can change your pointer to a pen and change colours of that pen and then draw circles on your slide to highlight.
If you want to jump to your opening slide, at the end of your presentation (in order to emphasize a point), you can press “Home” to jump to the very first slide in your presentation. If for some reasons you don’t get to the end of your presentation, and you want to jump to the end, simply hitting the “End” key will jump you to the very end slide in your presentation.
Good luck with your next presentation.

Get Ready to Be on Time


This tip is from Andrew Rogers LL.B. Editor of www.foolkit.com.au
I often used to be late for meetings.
Where I got into trouble was that I couldn’t resist doing one more “quick” task before I got ready to leave. Time disappeared and then I would realise that I should be leaving for the meeting. Except that I still hadn’t got ready. And often that took more time than I had optimistically imagined.
The revelation for me was to change the sequence. Now I get completely ready well in advance of the meeting. If I need more information, have to copy something or need to refresh my mind on the subject matter I can do that at leisure. It is only then that I allow myself to drift back into those quick tasks to fill the time before I have to leave.
Present Values

Today’s Tip: research with an eye to time relevance
OR
talk about today’s dollars.
When you are reading case law with a monetary award, you might want to look at that award in today dollar values. The Bank of Canada Inflation Calculator is a great link to put in your favourites as it can quickly give you a present value for a historical figure.
How significant is inflation? $10000 in 1969 is worth $61,354.17 today.
Save Yourself From the Dumbest Windows Feature Ever: Full Menus Off
Many installations of Microsoft Office have “Full menus” disabled. What does this mean? You only see limited menu choices (i.e., the ones you have used before and recently) when you click on File, Edit, View, Insert, etc.
When Full Menus is off you can’t see menu commands that you don’t use often or have never used before unless you click the two downwards pointing chevrons at the bottom of the menu – this forces Windows to show all the available commands on that menu. You can also double-click the menu to expand it.
When you expand one menu, all of the menus are expanded until you choose a command or perform another action. After you click an item on the expanded menu, the command is item added to the short version of the menu. If you do not use the command often, it is dropped from the short version of the menu.
Duh! This has to be the dumbest feature ever. Why hide menu items from yourself? This forces you into clicking a few extra times every time you want to use one of the hidden menu items. And for those just learning how to use Office, out-of-site means out-of-mind for menu items that they aren’t familiar with. This makes it harder for them to learn and use the true abilities of Office.
To work effectively or efficiently you should see all menu options all the time. To make this happen in any Office application, click on Tools, then Customize, then the Options tab, and check “Always show full menus”.
Give Your Clients a Roadmap

If they don’t already have one, most people report that they turn first to recommendations from friends and relatives when seeking a lawyer. So it makes sense that you’d like to keep your existing clients very happy so that they’ll recommend you to other people. But how do you go about it?
As we become more and more familiar with the areas of the law in which we concentrate, we sometimes tend to forget that a divorce, personal injury case, tax matter or bankruptcy may be completely uncharted, and usually very scary, territory for our client. So, at the beginning of every new case, give your client a roadmap. Doing so adds value by providing something tangible in exchange for a retainer or other advance payment, and it can really help your client to feel that he or she has chosen the right lawyer.
All you have to do is develop a written chronology or frequently asked questions sheet for each particular type of matter that you handle, to guide your clients through the process (for example, the authors recall seeing one done by doctors for their newly pregnant clients entitled: “What to Expect when You are Expecting“).
Once you have your roadmap together, slap some firm branding and graphics on it, along with your name and contact information so that the client holds on to it. It can become a marketing tool, too, should the client show it to someone else. Consider posting it to your website so clients can see how you treat new clients.
Not only will this help you create a sense of security for the client since he or she now knows what to expect and what is involved with the matter, how long handling the matter might take etc, but it can also help prevent unnecessary phone calls that waste your time and your client’s money.
The same is true of mapping out what the client can expect in dealing with you. If you incorporate this type of information into your fee agreement, you will provide tangible value at the first meeting while starting to also shape client expectations about the procedures your office uses to facilitate lawyer-client communications and handle emergencies, and what you expect in terms of billing and payment.
Typically none of us like surprises, particularly if they are not pleasant. Having a good roadmap helps everyone know what lies ahead.
Where Is That Statute Link?
To make your legislation investigation or monitoring task easier, check out the Canadian Legislation Table of links from the Lederman Law Library at Queen’s.
This organized resource offers links to current and retrospective legislation, usually from the primary source (i.e. Queen’s Printers).
A link to a jurisdiction’s statutes and regulations page on CanLII will also give their source of information.
Today’s Tip: For legislation, remember to go to the source.
For some extra info on the Why of a legislative change and some sources for that information, check out my post at Slaw yesterday and read the excellent suggestions in the comments. Special thanks to Colin Lachance and John Gregory for taking the time to comment.
Handy Keyboard Shortcuts for Formatting Text
Few things are more finicky than typing case citations in various legal documents. Most people use toolbar buttons to turn italics and underling on and off. Reach for mouse, reach back, reach for mouse again, reach back… There is a better and must faster way.
With these three simple keyboard shortcuts case typing case citations will be a breeze:
- Press Ctrl+I to turn italics on/off
- Press Ctrl+U to turn underline on/off
- Press Ctrl+B to turn bold on/off
A side note for those that are not familiar with the syntax for describing keyboard shortcuts. Simply remember that a plus sign (+) between two or more keys means that you press those keys, in the order they are listed, almost simultaneously, moving from left to right. For example, a capital B would be described as Shift+b. You release them in the opposite order.
There are two important things to remember when using the above shortcuts: You can use them together and they are all toggles. That is, repeatedly pressing the noted key combination cycles between on and off. If you want to type a case name in the middle of a sentence with bold and underline do the following: When you get to the point the case name starts, simply press Ctrl+B, then Ctrl+I, then type the case name. To turn bold and underline off, press Ctrl+B and then Ctrl+I again, and continue with the sentence.
Making Connections…
“Lawyers are terrified of making a human connection” – David Maister.
As lawyers, we live on Microsoft Outlook, we have blogs and we tweet and otherwise interact with the world in an electronic swirl. Yet ask yourself – can you bring up a mental picture of those people with whom you are sending and receiving email, reading or replying to their blogs or tweets? More importantly, do you think that your clients (or potential clients) can conjure up a picture of you when they think of “their” lawyer? Yet being able to bring up a mental picture of someone is the first step in bridging the distance and building a personal relationship between you and them.
As David Maister, the legal professional management guru has noted, lawyers are terrified of making a human connection. To follow this thought further – it seems we interact with our clients on a lofty plane. To be sure, a certain amount of professional detachment is a good thing – but not to the point where it interferes with building a strong, trusted professional relationship.
So how can you start to bridge this distance in an electronic world? Start by using v-cards (virtual cards) that are attached to your emails that also contain a picture of yourself. Once you set this up in Microsoft Outlook it is automatic -the v-card is attached to all outgoing emails. A recipient can click on the v-card and *voila* all your contact info is added to their address book (provided their email software recognizes and imports v-cards) including your picture.
Dave’s v-card at the Law Society of British Columbia is below:
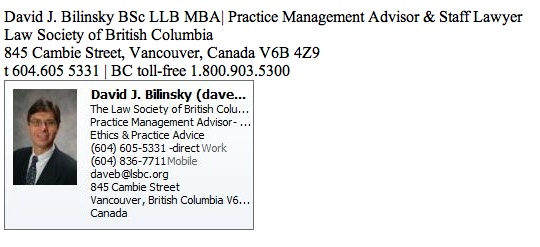
How can you do this? First you will need a professional looking photo of yourself in jpg format. Save it somewhere where you can find it on your hard drive.
Now – In Outlook 2007 for the PC:
Click on “Tools” then “Options” then “Mail Format” then “Signatures”. Set up a signature block for all your email (you can set up different ones for different circumstances if you wish) and be sure to click on “Business Card”. Find your contact information inside your Contacts listing (if it isn’t accurate, leave this and go back to your listing in Contacts and update it including adding your photo, then return here). If you have added your photo to your listing in “Contacts” you should see it as part of your business card which appears as part of your standard email signature block. Click “ok”. You should be good to go.
Now when you send someone an email, they can ‘connect’ with you on a human level – by “seeing” you before them!
(Hat tip to Barclay Johnson, a Victoria BC lawyer who provided the spark for this column).
Ask for Assistance
Today’s tip is simple. Ask for help.
There is too much information in the world to have an expertise in all but the most narrow of subjects. It is better to ask for assistance than to try to explain to someone why you expended unnecessary time and energy and might not have the ‘best’ answer. Ask for help or advice – from your partners, from your associates, from your students, from your network, from librarians in your organization or another.
There is no such thing as a dumb question.
Search Tips That Will Get You Better Google Results
It is amazing how Google can search the web and find exactly what you are looking for. However, as amazing as Google is, you can do a few things to help it better find the information you are searching for – read on.
These things will help Google find the specific information you are searching for:
- Use multiple search terms: Narrow your results with more search terms as Google will return only pages that include all of your search terms.
- Make your search terms as specific as possible to the information you are looking for.
- Remember Google uses stemming technology which means it will search for words that are similar to your search terms. Thus a search for diet will also include results with diets, dieting, dietary and so on.
- Google searches are NOT case sensitive. Everything will be understood as lower case, so john smith, John Smith, and JoHn SmItH will all return the same results.
- To include common words in your search (by default they are not searched) put a space and a “+” sign in front of them e.g., Star Wars, Episode +1. Look in the top right corner of the Results screen to see the words Google searched on.
- Use a phrase search by using double-quotation marks around two or more search terms. This is really helpful if you’re searching for proper names (“George Washington”), lyrics (“the long and winding road”), famous phrases (“Four score and seven years ago”), and computer error messages (“Maximum_Wait_Objects_Exceeded”).
- Use negative terms to exclude some pages from your results e.g., London Arkansas –England.
- Phrase your query in the form of an answer. Think about it: you don’t want Web pages that ask your question, you want pages that answer your question. So instead of typing, Who decided Marbury vs. Madison?, type Marbury vs. Madison was decided by.
And if you want even more ways to tweak your search, on the Google homepage click on Advanced Search for help on more of the searching options Google gives you.


